[Update] Xcode 10.2 Beta 1 does not change the behavior that is described below.
Learn how to distribute your iOS app with the arm64e CPU architecture slice.
Introduction
This year’s incarnation of Apple’s iOS devices features the new Apple A12 Bionic CPU. Performance improvements aside, it is the first commercially available 7nm silicone, and the first CPU with the arm64e CPU architecture (as usual, AnandTech covers Apple’s new CPU extensively). Its new security extensions might require you to make adjustments to your code. Apple explains the various usecases and provides necessary steps in their documentation. The new pointer authentication requirements of arm64e resulted in additional work for my team at App Center as well.
It turns out to be quite challenging to distribute an app with an arm64e slice today. While Xcode 10.1 added support for developers to test their app with new architecture, it is not possible to submit an app to the App Store or TestFlight. In fact, the arm64e architecture will be stripped away if you use Xcode’s Organizer window. This happens even when exporting for AdHoc or Enterprise distribution (see the Xcode 10.1 release notes), and even when exporting from the commandline via xcodebuild.
In this post, I will show you how you can circumvent this limitation and export an iOS app with the arm64e slice. You can distribute it to your testers (using one of the alternatives to TestFlight of course).
Export the .xcarchive with the new architecture
First, you need Xcode 10.1 installed on your machine. Open your app’s project or workspace in Xcode 10.1 and add the arm64e architecture as described in the documentation.

Once you have done that, archive your application the same way you normally would.
This assumes that your app’s dependencies support the arm64e architecture. We recently added arm64e support to the App Center SDK for iOS. I plan on covering our journey in another post.
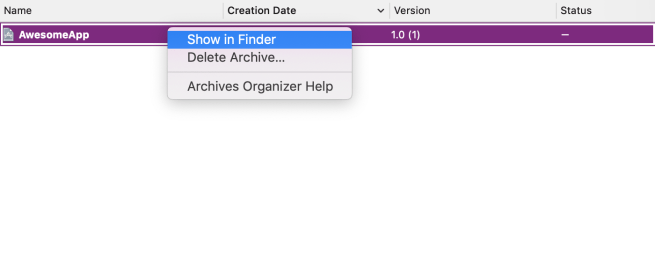
After Xcode has finished archiving the app, the Organizer window will open. Right-click on the archive that you just created and select “Show in Finder”.
I prefer to copy the .xcarchive package somewhere where I can find it easily. For my example, I’m choosing a folder on the desktop. To check if the binary in your .xcarchive package contains the slice for the arm64e architecture, run
lipo -info $PATH_TO_THE_BINARY_INSIDE_THE_XCARCHIVE.
The easiest way to get the path to the binary is: right-click on the .xcarchive package that you created, select “Show Package Contents”, and locate your .app package inside Products/Applications/. Then right-click on the .app package, select “Show Package Contents” once more, and find your app’s binary.
In my example, I need to run:
lipo -info /Users/benny/Desktop/AwesomeApp/AwesomeApp.xcarchive/Products/Applications/AwesomeApp.app/AwesomeApp.
This prints out the following:
Architectures in the fat file: /Users/benny/Desktop/AwesomeApp/AwesomeApp.xcarchive/Products/Applications/AwesomeApp.app/AwesomeApp are: arm64 arm64e
Awesome, the .xcarchive already contains the arm64e slice!
Create the .ipa file
The next step is to create the .ipa file that you can install on your new iPhone/iPad.
My initial idea was to switch back to Xcode 9.4.1, run xcodebuild -exportArchive -archivePath ./AwesomeApp.xcarchive/ -exportPath ./ -exportOptionsPlist ExportOptions.plist, and trick xcodebuild into exporting an .ipa file which contains the arm64e slice.
Unfortunately, this doesn’t work; signing the .dylibs and .frameworks will fail because Xcode 9.4.1’s code_sign tool will not be able to do it’s job – the .xcarchive was created in Xcode 10.1, after all.
Luckily, I learned about the ditto tool from a co-worker the other day. cd into the folder that contains your app’s .xcarchive and create a temporary directory structure:
mkdir -p tmp/app/Payload.
Copy your .app package into the directory using:
ditto AwesomeApp.xcarchive/Products/Applications/AwesomeApp.app tmp/app/Payload/AwesomeApp.app,
followed by:
ditto -ck --rsrc --sequesterRsrc --keepParent tmp/app/Payload/ AwesomeApp.ipa
Congratulations, you’re pretty much done. Use lipo -info on the app’s binary inside the .ipa package (unzip the .ipa, then use “Show Package Contents” ) to verify that it contains the arm64e architecture. It should print something like this:
/Users/benny/Desktop/AwesomeApp/Payload/AwesomeApp.app/AwesomeApp is architecture: arm64 arm64e
Now, go distribute your .ipa with the new arm64e architecture to your testers and squash all those bugs!
